Tampilkan postingan dengan label cookies. Tampilkan semua postingan

Senin, 27 Juni 2016

Candied Bacon

Dangerous candied bacon

What is that dark slimy looking spider like blob up there? Well its simply one of the most addicting flavors to ever be added to confections and desserts. Candied caramelized bacon. Thats right salty and smoky taste awesome with sweet and chewy food. Its almost evil. Putting meat in dessert feels bad, but tastes so good. Ive written this recipe before, but by popular request I have chosen to give candied bacon its own recipe. Its is amazing baked into chocolate chip cookies, or if youre really fancy these monster chocolate toffee cookies. You could also use it to garnish cupcakes (think banana peanut butter Elvis style!), doughnuts or whatever needs a modern and slightly wild kick. Whatever you put it in, people will ask you for the recipe. Send em here.

There are two popular recipes for candying bacon. Well one is more popular than the other. Most often I see recipes suggesting people put bacon on a silpat, cover with sugar, and let it do its thing in a 300 degree oven. That will work, and it will work with much less effort. But the bacon fat will crowd the baking sheet, and prevent the sugar from adhering and caramelizing perfectly. Small batches on top of the stove allows you to perfect the carmelization.

Candied Bacon

1 lb bacon
1 cup demura sugar (raw sugar)

Par-cook the bacon in a wide sauce pan or stock pot until only beginning to brown. You want to render off half the fat so you dont get that swimming in fat problem. I usually work in batches of 4-5 strips, pouring the fat off into a can between batches. You will finish cooking the bacon as it caramelizes.

Fry bacon a little bit to render off fat first

Pour off all remaining oil from pan. Sprinkle 1-2 tablespoons of sugar right on to the pan. Lay 4 strips of half cooked bacon on top, and cover with another layer of sugar. Let sit for 3-4 minutes until the sugar begins to melt. You may hear a quiet hiss or see small bubbles. If its loud and spitting oil you need to turn the heat down or you will burn the sugar. Periodically press the bacon down and into the sugar to really coat it. Flip after 5-6 minutes, and repeat. The bacon will be a very dark brown when its ready. Remove from pan and let harden in a cool place on a cookie sheet about 3 minutes. Repeat until all the bacon is done.

I find a pound of bacon takes the better part of an hour, maybe more like 90 minutes after clean up. You can chop the bacon up and add it to any baked good, or freeze it in airtight bags. The bacon is coated in salt and sugar, which means it should last for a few months. Dont be too ashamed to it plain like candy, sooooo good.

Senin, 30 Mei 2016

Onion Focaccia

Onions and yeast, ah the smell of it makes me drooly

Onions and wheat never go out of season (really just have a long shelf life) nor do they go out of style. In the dead of winter a hot loaf of bread is a breath of fresh air. Focaccia is a non-bakers friend. Its just pizza dough with extra oil. You dont have to knead if you have a food processor, and I suggest having a food processor. The other nice thing about this recipe is that the dough gets better the longer you let it sit in the fridge. Which means you can make mulitple batches of the dough in advance and bake it up in a snap without much effort. Its alittle richer than your average pizza dough recipe, but dont let that stop you from making pizzas with it.

Onion Focaccia

5 cups flour
.25 oz (or 2.5 tsp) active dry yeast
2 tsp sea salt
1 tsp honey
1/2 tsp apple cider vinegar
1/4 cup oil
1 3/4 cup warm water

4 onions
1 tsp olive oil, more for drizzeling
red pepper flakes to taste
1 tsp apple cider vinegar
1 tblsp medium ground corn meal
salt for sprinkling

Pulse 5 cups of flour, yeast, and salt to combine in the bowl of a food processor. Mix water, oil, honey, and vinegar together. Start the food processor and add the liquids in a steady stream. Dough will clump together and bang against the bowl once all the liquids are added. Keep processing for about 45 seconds. Sometimes my food processor starts to burn out (I can smell the motor) and I give it a minute break. The dough will be sticky. Scrape it directly into a sealable container. Let sit overnight in the fridge and up to 5 days. After 5 days you can freeze the dough for up to 6 months until you are ready to use it.

Sticky dough

Chop onion into 1/8 inch thick half moons. Now is when you really get to exert your power over food. Chop and cook those onions into tasty savory caramelized oblivion. Its best to use a thick bottomed pan so you can slowly brown them rather than burning them. Onions have a lot of sugar, and do burn if you dont watch out.

From this

To that

Add the onions, with 1 tsp of olive oil, a sprinkle of salt and red pepper flakes to a heavy bottomed pot over medium heat. Stir to coat the onions. Cook over medium until transparent. Add the vinegar scraping bottom to pick up an browned bits. reduce heat to medium low and cook for about 30-40 more minutes until deep caramel color forms. The longer the better. The volume will greatly reduce but the flavor will get bigger. Stir often. Onions can be made 2 days in advance and kept chilled.

Dough after 3 days in the fridge is loose and bubbly

Ready to bake? Get ready to fill the house with awesome scent of onion and yeast. Grease an 11x17 rimmed baking sheet (Im using my trusty jelly roll pan) and sprinkle with corn meal. Not just any corn meal, you need to get medium/coarse corn meal. Medium corn meal also doubles as polenta in my home, and could even be passed off as grits. Im no grits expert, but I think it does fine.

Corny meal, look for medium ground

Drop the chilled focaccia dough onto the baking sheet. Stretch it with your hands into a rectangle about 1/2 inch thick, nearly the size of the pan. Make indentations with your fingers. These will be little wells for the oil to collect in.

Sprinkle with a little oil and rub to cover. Next spread the caramelized onions over the dough. No for the part that separates pizza from focaccia drizzle the dough with olive oil until well coated and pooling in areas. Finish with a sprinkle of sea salt. Let sit in a draft free area for 60 minutes to warm up the dough and allow it to get puffy. Meanwhile preheat oven to 450 degrees. Bake for 20-25 minutes light browned. You will know by the smell when its almost there. Its the best smell on earth. Remove from the oven and cool on a wire rack. Slice and serve. Great a great snack for munching on while drinking beer. I made mine for super bowl. The focaccia didnt make it to the 2nd quarter.

Jumat, 20 Mei 2016

Lost and Found Oatmeal Cookies

Oats, butter, dried fruit, nuts, booze, coconut, this cookie has it all

I have 10 or so systems for keeping track of recipes I plan to cook. Tearing out pages from magazines and newspapers was my favorite before print died. Favorite-ing on Photograzing, Tastespotting, and from Flickr Groups are the easiest way to forget a recipe. Epicurious has a pretty good recipe box that Ive successfully been using while browsing food ideas for years. Emailing myself recipes and making simple text documents saved to my computer are the only way I can search for old recipes. If I can remember 1 or 2 ingredients in the missing recipe, technology will do the rest.

And so with a little determination and digging in every possible spot this oatmeal cookie recipe, lost for 3 years, has come back to me! It was on my Mac as part of cocktail party menu, copied from an online version of the Gourmet 2001 recipe. I substitute dried fruit for chocolate. The proportions of this cookie are great, and coconut always adds the oooh factor. Ooh being saturated fat. I discovered the importance of soaking dried fruit with this recipe. Ive brought these healthy cookies to lots of house warming parties, birthdays, and more because they go well with everything and stand as a meal on their own when a group gets together.

Lost and Found Oatmeal Cookies

1 1/2 cups finely chopped mix of dried fruit
(raisins, cranberries, figs, apricots, dates, etc.)
1 tablespoon brandy or rum (optional)
hot water

2 sticks (1 cup) butter
1 1/2 cup sugar
1 tsp molasses
2 eggs
1 1/2 tsp vanilla
1/2 tsp baking soda
1/2 tsp salt
1 cup flour
2 1/4 cups old-fashioned oats
1 1/2 cups finely shredded unsweetened coconut
3/4 cup almonds chopped

Mix dried fruit, booze, and hot water in a bowl and let sit for 5-10 minutes. Strain fruit, pressing to remove excess fluids, and set aside. The juices that drip off the the fruit are excellent with a little bit more brandy. Yum.

Combine butter, sugar, and molasses and beat with a mixer until fluffy, 3-5 minutes. Add eggs, one at a time, beating after each addition. Add in vanilla, baking soda, and salt, and beat for another minute. Add flour and mix until just combine. Add oats, shredded coconut, soaked fruit, and almonds. Mix until just combine. Chill for 2 hours or up to days covered in the refrigerator.

Preheat oven to 375 degrees. Drop cookies in 1/4 mounds on to cookie sheets, keeping 2-3 inches between each. Bake for 15-18 minutes. Let cool for 5 minutes before transferring to cooling racks.
Great for dunking in coffee, tea, or milk!

Jumat, 13 Mei 2016

Brooklyn Dirt Monthly Talks on Urban Farming and Gardening


The first Brooklyn Dirt talk is Wednesday at Sycamore. I organized this event with Sustainable Flatbush, and Im looking forward to "digging deep."

Prospect Farm and Sustainable Flatbush are proud to present Brooklyn Dirt: Monthly Talks on Urban Farming and Gardening.


Talk One: Dirt and Soil

With Speakers Jay Smith and Chris Kreussling (AKA Flatbush Gardener)


Sycamore Bar and Flowershop

Wednesday February 16th, 2011

7 - 9:30 pm

1118 Cortelyou RD, BK

Q train to Cortelyou

21+

$5 suggested donation

proceeds benefit Prospect Farm and the Urban Gardens and Farms Initiative of Sustainable Flatbush


Event on Facebook: http://www.facebook.com/event.php?eid=188915917798918


-------


Jay Smith is a lifelong environmentalist, member of several environmental organizations, member of the Park Slope Food Coop, completing a Certificate of Horticulture from BBG, deeply interested in Urban Agriculture and re-localization of food production in anticipation of food issues in the wake of the peak oil crisis.


Chris Kreussling (AKA Flatbush Gardener) is a garden coach with more than 30 years gardening experience in NYC. Chris is also the Directory of the Urban Gardens and Farms initiative of Sustainable Flatbush and a community member of the Healthy Soils, Healthy Communities advisory board, a project of the Cornell Waste Management Institute, and earned a BBG Certificate in Horticulture, 2009.

http://flatbushgardener.blogspot.com


Sustainable Flatbush brings neighbors together to mobilize, educate, and advocate for sustainable living in their Brooklyn neighborhood and beyond.

http://sustainableflatbush.org/


Prospect Farm is a community group in Windsor Terrace, Brooklyn that is working together to grow food in a formerly vacant lot, with the mission toward creating a Community Supported Agriculture (CSA) Farm that can serve our community. Prospect Farm is the community leader for the Kensington/Windsor Terrace neighborhood group for the Brooklyn Food Coalition.

http://prospectfarm.org/


Selasa, 03 Mei 2016

Cucumber Mint Vodka Watermelon


Watermelon man hole for vodka

I should have posted this a few days ago. Im worried youll see this post and want to make a big fat vodka watermelon for your Labor day picnic/bbq/yacht party. And you should want to but you need to act NOW. Thats right, if you are slightest bit interested in boozing up a watermelon turn off the computer, buy a watermelon and some vodka and come back.

Did you do it? Lets proceed. It is not common knowledge unless you have tried this or read lots of recipe comments that it can take up to FOUR DAYS for your watermelon to absorb vodka. There are million recipes that look simple, and you think will take 6 hours or overnight. Unless you know where to buy a "dry" watermelon it will take at least 2 full days for a great vodka watermelon to begin. A week would be awesome. You might not get invited back to the party if arent careful. Here are my real time instructions.

Cucumber Mint Vodka Watermelon

1 large watermelon
1/2 cucumber cut into spears, divided
1 handful of fresh mint leaves, divided
2 350 ml bottles of vodka

Youre going to be feeding your watermelon over the course of a few days, so first youll want to prepare the watermelon and space for it. Now look at your fridge and make sure that you can fit the watermelon with 6-7 inches head space for the vodka on a shelf. You may need to rearrange shelves. Place the watermelon on a plate to catch run off juice, and prevent it from sliding around. I also used an upside down coffee can lid to keep it snug.

Make sure you have room for this in your fridge

Take an old, but clean cap from a bottle of oil or similar. Press the cap down onto the top of the watermelon, where you plan to feed it, making an indentation. Now cut inside that indentation to make an opening. Using a spoon dig down and carve out some watermelon. 5-6 inches is good, or to the center of the watermelon. Turn the watermelon upside down and drain out some of the fluids too.

Fill the watermelon cavity half way with vodka from the first bottle of vodka. Slide half the cucumber spears and mint into the vodka bottle. Now for your big maneuver, carefully flip the vodka bottle into the watermelon. Place in the fridge and let sit for 1-2 days until absorbed. After the first bottle is absorbed, crack open the second and repeat the last set of steps. Some of the vodka may not absorb from the second bottle. It depends on the size and juiciness of your melon.

When its party time you can use the same cap from the first step as plug to keep all the juice in place! Smart! Or just cut it up and bring it in slices, but there really is nothing like a the show of carving the vodka watermelon in front of a hot and thirsty audience.

Minggu, 24 April 2016

Jam Thumbprint Cookies

Jamming

From last Wednesday to this Tuesday I brought cookies to several offices of clients and many of the people who make my life easier all year long. I made 5 varieties of cookies, piparkakut, buckeyes, sugar cookies, chocolate cookies with candied bacon and these jam thumbprints. Without a doubt the most coveted and devoured cookies were jam thumbprints. I was glad. Theyre mine too, since childhood. A classic combination of rich butter cookies coated with nuts (or coconut, or neither) with a dab of jewel like jam in the center. Pretty and pleasing on multiple levels.

I grew up eating the cookies with red currant jam. The tart jam suits the rich cookie with a pure ruby color. Im far too experimental for traditions. I filled mine with mulberry preserves that I canned this summer. The chunky preserves dont sit flat or fill the thumbprint indent well. The flavor is great and under-sweetened, as like it. I had a revelation just a few days ago. If I dont need to use jam in the cookie, then I dont need to use walnuts or pecans on the outside either. Apricot jam and pistachios, nutella with hazelnuts, coconut with lemon curd. Nothing is stopping me from banging out a whole series of thumbprints with a unique touch. Next year! or maybe next month. These are good cookies.

Jam Thumbprint Cookies

2 sticks of unsalted butter
1/2 cup sugar
2 eggs, yolks separated from the whites
1 tsp vanilla
1/4 tsp salt
2 cups flour
1/2 pound nuts, chopped medium fine
jam

Cream butter with sugar for 5 minutes until pale and fluffy with a standing or electric mixer. Add egg yolks and blend another minute. Add vanilla and salt, blend again. Add half the flour and lightly blend until just combine. Add the remaining flour and carefully stir by hand until just combine. Shape dough into a disk, wrap in waxed paper, and chill for 3 hours to overnight. The dough can frozen for up to a week before baking.

Preheat oven to 350 degrees. Divide the dough into 24 sections. Roll each section into a 1 inch ball. Divide balls larger then 1 inch into extra cookies, you may have a few. Lightly whisk remaining egg whites in a bowl.

Cookie set up

Time to decorate and form the cookies. Its a good idea to organize all of the remaining ingredients. I like to place the formed dough balls on a plate in a row next to the beaten egg whites, and chopped nuts all near the baking sheet. Roll dough balls in the egg whites. Place in the chopped nuts and cover with nuts. Dont roll the ball in the nuts. That will cover the nuts in egg whites, and prevent them from sticking to your dough balls. If that happens, which it does, press the nuts into the cookies gently with your palms.


Birds nests? No, cookies.

Continue coating all the dough balls. Place the nut coated dough balls on a cookies sheet about 1 inch apart. Now the fun part. Press straight down with your thumb through the top and center of the dough ball to make an indentation. Bake for 10 minutes until pale to light golden, but set. My cookies often spread, causing less of a thumbprint. Im not sure if its the recipe, or the way I treat my ingredients. Anyways, you may need to reform your thumbprint by pressing down again. Act quickly, dont burn yourself.

Someone want to give me a new cookie sheet for Xmas, this one is done!

Use a small spoon to scoop up some jam. Scrape/push the jam with another spoon into the thumbprint center of all the cookies. Place back in the oven for 2-4 minutes until the cookies are golden, and the jam has melted/settled into the cookie. Remove from oven and cool on racks.

There are alternatives to my jam filling technique described above.
A) Bake the cookie with the jam in the cookie from the start. I find this cooks the jam giving it a weird skin.
B) Drop the jam into the cookies as they come out. This only sort of works in my experience. Often the jam doesnt melt into the thumbprint.
C) Melt the jam ahead of time, and spoon into the cookies as they come out. This is equally effective as my method, but creates an extra pan or bowl to clean. Not my style.

Bread and Burritos in Springy San Francisco

San Franciscos best Tartine bread basking in 4:59 pm light

I havent been updating Cantaloupe Alone much, but I have not stopped eating. I know some people love to blog, twitter, and post while on vacation, but Im in my element away from electronic devices. Today is my first day back from a quick 2 day trip to San Francisco visiting good friend and food lover / artist extrodianare Ava.

First stop: Tartine. Hands down the trip could have ended after a morning of sampling 1 gougère (light and cheesy), 1 scone (just nice), 1 almond croissant (monstrous and delicious), and 1 morning bun (the classic). The morning bun was so much more sophisticated then I imagined. Flaky croissant dough with crispy caramelized top with crusty and sweet bottom, hints of orange, rich but not overpoweringly decadent. Worth waiting in line for. Perfect with their bottomless coffee. I didnt remember my camera!

Tartine bread several minutes old

The next afternoon we happened to be biking home from nearby Dolores Park at approximately 4:50 pm. Several minutes before their famed bread comes out of the oven. In perfect time we snagged a loaf with zero wait. Fortuitously Josey Baker Bread happened to bike by for a with a 3 gallon drum of flour under arm. A real San Fran moment in gluten history. I found the bread incredibly flavorful with a great sour dough tang. Our bread was still steaming inside. We were perhaps a few minutes too early cutting the loaf in half before the hot moisture finished absorbing into the thick loaf, as explained by Mr. Baker Bread. Later on when the bread was cool I found the texture silky and soft with a big chew. Easily one of the best bread experiences ever.

Ceviche from El Farralito

You cant visit San Francisco without eating Mexican food in the Mission. I had a veg bean burrito with drips and drops of all the different salsas from El Farralito. Avas ceviche was the winning item at lunch. California has some choice produce and seafood that make every flavor bigger and fresher.

El Farralito burrito

Other food moments of note included sushi from Japantowns grocery store, Italian food in North Beach, Its It ice cream sandwich, ice cream, ice cream, more ice cream, and homemade spaghetti, and numerous sweet California oranges. Ill have San Francisco on the brain for a while. Its a great city to get to know. I was lucky to see so much in a short time with the help of two bikes and a fun friend.

Minggu, 17 April 2016

Christmas Cookie no 4 Sesame Cookies

Why are sesame seeds so cute. Love them on a little cookie.

Ive made Pistachio Apricot cookies for their fruity nutty flavor. Nutella Dream cookies are a gooey filled surprise. The gluten-free ginger bread people fulfill the ginger spice category and cover the gluten-challenged people on my list. I wanted the next cookie to be less sweet. Im a sugar junky, but I know a lot of people like to take it easy on the sweets. Sesame seeds are just the savory to sweet flavor to top off such a less than sweet crunchy little cookie that could almost pass as a mini biscotti. The dough is easy to make, and dousing dough balls in sesame seeds takes a fraction of the time it takes cut and decorate them. Its on my cookie list for sure. This recipe is based on the version on Giusto Gusto.

Sesame Cookies

1 cup sugar
1 1/2 sticks butter
4 tblsp olive oil
3 eggs
1 tsp vanilla
1 tblsp baking powder
1/2 tsp salt
4 cups flour
2 cups sesame seeds

Mix sugar, butter and oil in the bowl of standing mixer for 7 minutes until light and fluffy, scraping sides of mixer at least once. Add eggs one at a time, mixing between in each addition. Scrape down sides of mixer. Add vanilla, baking powder, and salt, and mix for another 2 minutes until combined. Add half the flour and mix until barely combined. Add remaining flour and mix until combined. I like to take the bowl off the mixer during the last few mixes of dough and get in there by hand to make sure its evenly mixed.Chill dough for 1 hour to overnight.

Preheat oven to 350. Scoop one tablespoon of dough. Roll the ball in a circle on your palms to create a ball. Then roll back and forth to make slightly oval. Place shaped dough on a tray and continue until all the dough is formed. Place the 2 cups of sesame seeds into bowl. Roll each dough ball in the seeds to cover and place on an ungreased baking sheet, about 1 inch apart. Bake for about 20 minutes until golden brown on the bottom. Transfer cookies to cooling racks.

Makes about 3 1/2 dozen cookies

Callaloo Coconut Soup

Howdayado Callaloo Soup

Big bunches of callaloo have been inhabiting my vegetable drawer, a large part of my Ditmas Park CSA. I vaguely know what to do with callaloo. Stew, soup, steam? Its like spinach, with a little bit more iron, and perhaps a less tender. Callaloo has a pleasant mineral taste that really mellows in a soup. Im happy its here before its too hot to cook it down in a soup. Make sure to rinse it plenty of times to remove the grit that may be on it. Nothing worse than dirty grit callaloo stew.

Almost like spinach, but healthier

Callaloo Coconut Soup

1 large bunch callaloo (roughly 1 lb)
1 large onion, diced
2 tblsp vegetable oil
6 cloves of garlic, chopped
1 quart water
1 can coconut milk (unsweetened)
1/2 tsp fresh grated nutmeg
1 pinch red pepper
1 tblsp white wine vinegar
salt to taste

Separate leaves from callaloo stems. Rinse each individually in a large clear bowl. Rinse callaloo until water is clear to make sure all the grit is off. Meanwhile heat oil over medium heat in a large soup pot. Add onion with a large pinch of salt and cook until transparent. Chop callaloo stems down to 1/4 - 1/8" pieces. Add to onion and cook for about 10 minutes until soft. Add the callaloo leaves with about 1 cup of water to the pot. Stir and cook until softened. Add remaining ingredients: water, coconut milk, spices, and vinegar. Bring to a boil, and turn off heat. Transfer soup to a high speed blender or food processor. Process until smooth. Add salt to taste and serve.

Selasa, 12 April 2016

Venison Chili

meal

January to February is chili season, directly following Christmas cookie season. Easy, fast, spicy, warming, and and easy way to feel like youve eaten a round meal with just one bowl.

Dangerously close to a year ago I was given venison loin by my cousin Mary-Tyler. The venison was hunted by her half of the family, likely in Virgina. Mary-Tyler will correct me in the comments if Im wrong. I wasnt sure if the venison would be freezer burned (from a year in the freezer) or if the meat would be too strong. The venison was neither, and I ate a hunk hot off the stove. It was a little bit of a waste to cover up great meat in chili, but this is some outstanding chili. One thing to note, I defrosted the venison on a shallow plate in the fridge. The plate was brimming with blood when it thawed, and got everywhere. Gross. Watch out.

Venison Chili

1 lb venison
1/4 cup red wine vinegar
2 tblsp canola oil
1/4 tsp salt
1 onion, chopped
8 cloves garlic, chopped
1/2 tsp fresh ground pepper
1/8 tsp cayenne pepper (or more)
1 tblsp ground cumin (I fresh roast and grind cumin seeds for much better flavor)
1 tsp ground coriander (roasted and ground seeds preferred)
2 tsp chili powder (ditto with above)
28 oz can crushed tomatoes
1 can black beans
1 can kidney beans
2 cans water

Put venison a stock pot with 1/4 cup vinegar and water to cover 1 inch. Let sit for 3-5 hours. Soaking in vinegar is supposed to tenderize the meat and remove gamy flavor. Im not too sure if you should soak the meat longer or shorter period of time. I couldnt find specific directions online. Please leave your thoughts in the comments if you know better. When ready to make chili remove venison from the water, and wring out. Pat with many, many paper towels to dry.

Add oil to a stockpot and heat over high fire until oil is smoking. Salt the venison and carefully add to the stock pot. Cook until browned, turning to brown each side. Remove and let sit 5-10 minutes. Dont worry if the venison is raw on the inside, you arent done cooking it.

Add onions and salt to the pot and saute over medium heat until transparent. Add chopped garlic and spices. Continue to cook for 2 minutes. Toss in the crushed tomatoes and beans with fluids. Fill each bean can with water and add to the pot. Stir. Cut the browned venison into 3/4 inch chunks and return to the pot with any drippings. Stir again. Taste and adjust seasonings as needed. Simmer for 30 minutes and serve. Tastes great with beer and cornbread. Makes about 8 cups of chili.

Sabtu, 09 April 2016

KWT Winter CSA Month 2 January


Happy New Year. Its snowing leafy green vegetables with a high of 55 degrees in Brooklyn. My CSA is great this month, heavier than the previous month and just as vibrant. A result of warm weather, or just good agriculture practices from Garden of Eve? I look forward to eating the results. Here is what was included:

Kensington Windsor Terrace Winter CSA Month 2: January
1 big bunch of arugala
1 bunch beets
1 bag broccoli
2 bags of salad greens
1 bag of kale
1 bag of collards
8 yellow/white carrots
6 turnips
3 potatoes
3 medium diakons
3 heads of garlic
3 DOZEN EGGS (thats alot!)

Heres my plan of attack: eat the salad greens up first, as they are the most perishiable. I will probably eat them in salad for dinner and chopped up with beans for lunch. Diakon and carrots will get sliced up for snacking on plain. I will have an egg and potato. I predict some savory bread pudding in my future too. For dinner Ill make a pot of black bean soup and toss a few handfuls of collards, kale, and beet greens in. I loved the roasted broccoli I made last month, maybe Ill try something new this month. Those white juicy crunch turnips will be gone by Monday. I love to snack on them plain.

Kamis, 07 April 2016

Vegetable Hunting in Early Spring

I spent a solid 3 weeks consuming bread, cheese, meat, sugar, and dairy. Less of a craving, and more situational testing out recipes (scotch eggs, mac & cheese with bacon, shepards pie, mushroom pot pie, rolls, crackers, and more obscene baked goods Ill show you later) and cooking for a big dinner party. This week I decided to veg out at the Grand Army Plaza farmers market in Brooklyn. Its been a cold and wet spring in the New York City area, but you can still make a weeks meal from the goods at the market. Cheese, meat, yogurt, flours, grains, legumes, pickles, jam, bread, cookies, and doughnuts are popular 52 weeks a year at the market. Hard vegetables and and hardy leafy greens are out too. Here is some of the veggie porn for your viewing:


Mushrooms, as expensive as meat but hardy and full of minerals and fiber. Dont chop the character of these unique shrooms as an ingredient in other dishes. Saute them in butter or oil and let them stand on their own feet as a beautiful entree or side dish.

Spinach, cool weathers great irony, green gift for salads, layered in lasagna and pastas, soups, frittata, or simply steamed and tossed with sauteed garlic.

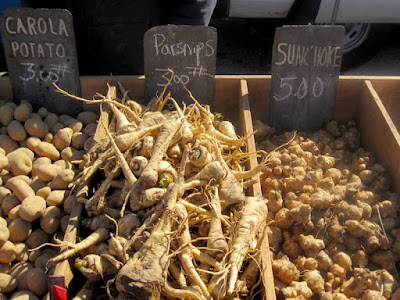
Potatoes are everywhere, parsnips are fewer found, but sunchokes (aka Jerusalem artichokes) are harder to find. Sunchokes with a smooth, nutty tuber taste can be lightly steamed and then sauteed in butter (really all farm fresh veggies are excellent this way), sliced and fried into chips, pickled, or roasted with other root vegetables like parsnips or carrot.

Apples are around most of the year too. Its a New Yorks specialty. Winesaps are my favorite orchard apple; crispy, tart with just a little sweetness. Perfect for eating raw. These winesaps reminded me of the kind I used to pick growing up in Ohio.

Radishes, turnips, kohlrabi, and daikon of all shapes, sizes with varying spicy flavors. These groundlings make awesome pickles, are great shredded or chopped into salads and slaws, sliced into discs for dip, or try a savory Asian daikon cake.

I also saw an abundance of carrots, squash, cabbage, leeks, onions, herbs, and ornamental flowers. Just a few stands had pea shoots. More of those plus ramps will be on their way soon. And oh I cant wait for my CSA to start up too.

Kamis, 31 Maret 2016

Rainbow Cookies

Happy rainbow cookie will make you WORK

Rainbow cookies nearly defeated me. To make them requires almost 1 lb almond paste, 6 eggs, 2 lb of butter, lots of steps to make the batter, 3 rectangle pans to bake, many steps to assemble, and so much patience. Multiple steps means multiple ways to screw up, and once youve messed up a few steps youre going down a creek without a paddle. You can see the struggle in the photos, but I did not give up.

The cookies tasted fine, but not perfect. I found the recipe in the May 2o11 issue of Bon Appétit. You may also notice my cookies are yellow, red, and blue rather than the Italian reg, white, and green. I made the cookies to match my composting diagram for Prospect Farm. I brought the cookies to Compost for Brooklyns Block Party to highlight the layers of trench compost. Each cookie acted as a mini trench compost diagram. A cute idea that some appreciated, and had some asking is this made of dirt?

Rainbow Cookies
2 tblsp plus 2 cups unsalted butter, at room temp
6 large egg white
6 large egg yolks
1 1/3 cups sugar, divided
12 oz almond paste (not marzipan), chopped
2 3/4 cups plus 1 tblsp flour
1 tsp salt
1 tsp red food coloring
1/2 tsp yellow food coloring
1 tsp blue food coloring
3/4 cup orange marmalade
4 oz bittersweet chocolate

Whip 6 egg whites until soft peaks form. Add 1/3 cup sugar and continue to beat until firm peaks form. Chill. Meanwhile line three 9 x 13 inch rectangular baking pans with foil, allowing foil to overhang length-wise. Grease foil and sides of the pans with 2 tablespoons of butter.

Add 1 cup of almond paste and sugar to a mixer and beat at medium speed for 5 minutes. Increase speed to medium high and slowly add 2 cups of butter. Beat until fluffy. Add in yolks, one at a time until combine. Add salt and flour, being careful not to over mix. Fold egg whites in two additions by hand with a spatula. Lots of work, eh? Take a breather.

Uggh, I hate artificial colors, but its a tradition.
You can use green in place of blue to, so Italian.

Preheat oven to 350. Divide batter into 3 bowls. Add 1 color of food coloring to each bowl, and fold until evenly colored. Now youre ready to bake. Transfer each colored batter into one prepared pan. Spread evenly, and place in oven. Bake for 9-12 minutes. Rotate pans half way. Remove cakes from the oven when batter is just set.

Yellow layer will go up, over, and on top of the marmalade covered red layer

Meanwhile melt marmalade. The recipe suggests you strain the peel parts out, but I think its fine to leave it in. Brush half of the marmalade on top of the red layer. Lift the yellow layer up using the overhanging foil. Flip top-side-down over the red layer. Peel foil back. Brush the top of the yellow layer with remaining marmalade. Lift the blue layer up using the overhanging foil. Flip top-side-down over the yellow layer. Do not peel the top layer of foil. Place a cookie sheet on top of blue layer. Carefully flip all layers on to the cookie sheet. Place another cookie sheet over the red layer. Weight down with cans, and chill for 4 hours or up to one day. Congratulate yourself on completing the hardest part of making rainbow cookies. You are out of the woods.

Ready to chill? The layers are.

Melt the 4 oz of chocolate over in a double boiler (or a heat proof bowl such as stainless steel or tempered glass, over boiling water) or in a microwave. Whichever you prefer. Remove cake layers from fridge, and peel back top layer of foil. Brush half the chocolate over the red layer.

Take your time, and the results will line up neater then mine. Less trimming equals less waste.

Place uncovered in freezer for 15 minutes to harden the chocolate. Remove from freezer. Place wax paper on top of chocolate layer. Replace cookie sheet over waxed paper, and carefully flip so blue layer is now up. Peel back foil on the blue layer. Brush remaining chocolate over blue layer. Freezer, uncovered for another 15 minutes until hardened. Cut the cookie into 1/2 - 3/4 inch slices. Serve! Finally! I kept mine in an airtight freezer container until they were ready to be served.

Selasa, 29 Maret 2016

KWT Winter CSA Month 3 February


I wasnt expecting a rainbow of foods in February. We are digging deeper into the dog days of winter, which means we must dig for our food too. 3 varieties of potatoes, daikon, two kinds of onion, garlic, beets, carrots, turnips. Im gonna list this down below, thats a tubular amount of tubers.

Im glad for the 2 spots of green collards and salad mix, which I will thoroughly wash. Slugs! I found 4 slugs in last months greens. Im sorry to say there probably were more that I unintentionally ingested. I was a little too disgusted to photograph them, but next time I catch one I will publish the evidence.

Kensington Windsor Terrace Winter CSA Month 3 February
1 head cabbage
1 bag collards
1 little bag salad greens
1 shallot
1 red onion
2 heads garlic
10 medium and large beets
5 medium diakon radishes
5 large carrots
4 medium turnips
3 lbs red potatoes
2 lbs russet potatoes
2 lb sweet potatoes

Im thinking the cabbage will become sauerkraut, which I havent had this winter yet. I eat the potatoes for breakfast like home fries (who needs toast?) with an egg on top. I prefer not to eat large turnips raw so I will probably cube and roast them, or try maybe something new. Previously I was slicing the daikon and carrots up and eating them with lunch and for a snack. Daikon cakes seem to be in my future with the volume. I will boil the beets until they are soft peel, cut, and toss them with garlic, shallot, parsley and black eyed peas for lunch. Today I plan to make a big pot of lentil soup with a little bit of all of the above because Im just dying to taste it all.

Senin, 21 Maret 2016

KWT Winter CSA Month 4 March


winter vegetable pile


I love trying new vegetables. Scratch that, I live to try new vegetables. I love to compare them in my head, and think up new combinations. In the end I mostly eat the whole thing plain. This months Kensington Windsor Terrace CSA includes chickweed. Our pre-distribution email explains that chickweed:

"Like most wild food it is super high in vitamins and minerals (Iron, Copper, Manganese, Magnesium, Zinc, Potassium, Vitamin C and A). It is higher in iron and zinc than any domesticated green." and goes on to say, "Helps maintain healthy weight (contains saponins, which may help to bind fats and remove them from the body). Nourishing for the lungs. Helps carry off cellular debris through our lymph system and it also helps clean out and clean up cysts. Great for drawing out infections and soothing pain. Great remedy for eye problem."

Oh man that is specific. Cysts look out chickweed is coming to get you. My lungs will probably be grateful. Just a thought on this wonderful explicit passage, are other vegetables just as nourishing and or good for killing cysts? Or is chickweed oh so special. If so then why arent we eating it already? The chickweed tastes pretty good. Crisp with a mineral flavor a lot like fresh romain lettuce, but a touch metallic. Its long and stem-y with dainty leaves, even a few edible flowers. The stems are not tough. I like it.

Included in this months Kensington Windsor Terrace March CSA
1 bag of mixed red, blue and white potatoes, about 3lb
several yams
8 small baking potatoes
3 lb carrots
2 lb beets
1 lb purple top turnips
1 rutabaga
2lb daikon
1 bag braising greens
1 big bunch of chickweed
1 dozen eggs

Im going to have to eat a lot of potatoes for breakfast this month. Perhaps some potato pizzas are necessary. The other root vegetables may become the worlds biggest sheet of roasted root vegetables. I dont know how to explain exactly but when roasted vegetables just disappear off my plate. A tub of soup wouldnt hurt either.
 

Aquaponics get Here Copyright © 2016 -- Powered by Blogger