Tampilkan postingan dengan label spring. Tampilkan semua postingan

Jumat, 24 Juni 2016

2013 Spring Growing in the Aquaponic System

Well, its been awhile since my last post, but Ive been busy during the winter. After 18 months of fish waste buildup in the gravel growbeds I had the misfortune of major clogging in the beds with fish waste at the end of December. Two of my grow beds clogged completely, causing them to overflow and draining two of the fish tanks overnight.  I only had about 4"-6" of water in each tank,  but thankfully I didnt lose any fish, but due to the extreme cold of the water(approx. 45 degrees), it took me several days to fill the tanks back up. I had to add water and wait for it to heat up over a day, then add more, and on and on until both were full. I then took on the task of cleaning the growbeds, this took approx. 7 full days over a two to three week period in January, in the cold. It wasnt any fun, since I only had a five gallon bucket with holes in the bottom covered with mesh and a high pressure hose nozzle on a garden hose. I could only wash about three gallons of gravel at a time. It was painstaking, back breaking work, and cleaning 400 gallons of gravel should not be taken lightly, but it paid off in the end. Unfortunately, I had contracted the flu while doing this in temps that hovered in the 30-40 degree range and I paid for it afterwards.
I had  to remove all 40 tomato plants and most of the basil and mint from the beds, everything else had been choked out by the basil and tomato plants prior to the clogging. I was able to salvage a few pieces of mint and a few basil plants, but everything else was tossed out. I replanted 6 weeks ago and you can see from the video that cleaning the gravel beds was well worth the effort.


Enjoy...and keep on growing.

Minggu, 17 April 2016

Callaloo Coconut Soup

Howdayado Callaloo Soup

Big bunches of callaloo have been inhabiting my vegetable drawer, a large part of my Ditmas Park CSA. I vaguely know what to do with callaloo. Stew, soup, steam? Its like spinach, with a little bit more iron, and perhaps a less tender. Callaloo has a pleasant mineral taste that really mellows in a soup. Im happy its here before its too hot to cook it down in a soup. Make sure to rinse it plenty of times to remove the grit that may be on it. Nothing worse than dirty grit callaloo stew.

Almost like spinach, but healthier

Callaloo Coconut Soup

1 large bunch callaloo (roughly 1 lb)
1 large onion, diced
2 tblsp vegetable oil
6 cloves of garlic, chopped
1 quart water
1 can coconut milk (unsweetened)
1/2 tsp fresh grated nutmeg
1 pinch red pepper
1 tblsp white wine vinegar
salt to taste

Separate leaves from callaloo stems. Rinse each individually in a large clear bowl. Rinse callaloo until water is clear to make sure all the grit is off. Meanwhile heat oil over medium heat in a large soup pot. Add onion with a large pinch of salt and cook until transparent. Chop callaloo stems down to 1/4 - 1/8" pieces. Add to onion and cook for about 10 minutes until soft. Add the callaloo leaves with about 1 cup of water to the pot. Stir and cook until softened. Add remaining ingredients: water, coconut milk, spices, and vinegar. Bring to a boil, and turn off heat. Transfer soup to a high speed blender or food processor. Process until smooth. Add salt to taste and serve.

Kamis, 07 April 2016

Vegetable Hunting in Early Spring

I spent a solid 3 weeks consuming bread, cheese, meat, sugar, and dairy. Less of a craving, and more situational testing out recipes (scotch eggs, mac & cheese with bacon, shepards pie, mushroom pot pie, rolls, crackers, and more obscene baked goods Ill show you later) and cooking for a big dinner party. This week I decided to veg out at the Grand Army Plaza farmers market in Brooklyn. Its been a cold and wet spring in the New York City area, but you can still make a weeks meal from the goods at the market. Cheese, meat, yogurt, flours, grains, legumes, pickles, jam, bread, cookies, and doughnuts are popular 52 weeks a year at the market. Hard vegetables and and hardy leafy greens are out too. Here is some of the veggie porn for your viewing:


Mushrooms, as expensive as meat but hardy and full of minerals and fiber. Dont chop the character of these unique shrooms as an ingredient in other dishes. Saute them in butter or oil and let them stand on their own feet as a beautiful entree or side dish.

Spinach, cool weathers great irony, green gift for salads, layered in lasagna and pastas, soups, frittata, or simply steamed and tossed with sauteed garlic.

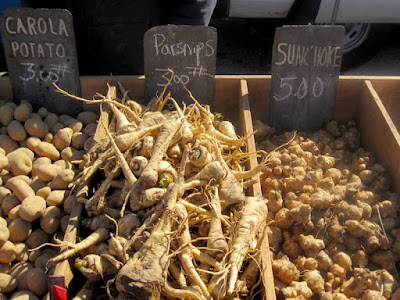
Potatoes are everywhere, parsnips are fewer found, but sunchokes (aka Jerusalem artichokes) are harder to find. Sunchokes with a smooth, nutty tuber taste can be lightly steamed and then sauteed in butter (really all farm fresh veggies are excellent this way), sliced and fried into chips, pickled, or roasted with other root vegetables like parsnips or carrot.

Apples are around most of the year too. Its a New Yorks specialty. Winesaps are my favorite orchard apple; crispy, tart with just a little sweetness. Perfect for eating raw. These winesaps reminded me of the kind I used to pick growing up in Ohio.

Radishes, turnips, kohlrabi, and daikon of all shapes, sizes with varying spicy flavors. These groundlings make awesome pickles, are great shredded or chopped into salads and slaws, sliced into discs for dip, or try a savory Asian daikon cake.

I also saw an abundance of carrots, squash, cabbage, leeks, onions, herbs, and ornamental flowers. Just a few stands had pea shoots. More of those plus ramps will be on their way soon. And oh I cant wait for my CSA to start up too.

Jumat, 01 April 2016

One Dead Fish And Some Tomatoes


Never nice when things die, and that even goes for my nameless fish!
He was a small one (probably from the second batch we bought). And he appeared to have some sort of infection around his eyes, watching him I had noticed the cat fish attacking him a few times. Not a good sign. I took him out of the tank and had a more detailed look at him. No energy, and he did not seem bother to suck in the air,  and on putting him back in the tank it was clear he had lost interest in life. What to do? I was worried he would infect all the other guys so unfortunately he had to go. Where you ask? Over the wall. Finished. Sadly.


The tomatoes on the other hand are doing OK. Minimal disease and only a few white fly to worry about. Interestingly around the flood pipes to the grow beds where we have put a small mesh to stop the water flowing too fast it is attracting numerouns bees. Seem to be the water which they are after. Maybe also to whatever it is thats in the water.

Also planted some seeds, 5 different Thai herbs, so will wait and see how they develop. Interesting.
And might even get some red tomatoes in a  few weeks. Watch this spot.

Kamis, 31 Maret 2016

Rainbow Cookies

Happy rainbow cookie will make you WORK

Rainbow cookies nearly defeated me. To make them requires almost 1 lb almond paste, 6 eggs, 2 lb of butter, lots of steps to make the batter, 3 rectangle pans to bake, many steps to assemble, and so much patience. Multiple steps means multiple ways to screw up, and once youve messed up a few steps youre going down a creek without a paddle. You can see the struggle in the photos, but I did not give up.

The cookies tasted fine, but not perfect. I found the recipe in the May 2o11 issue of Bon Appétit. You may also notice my cookies are yellow, red, and blue rather than the Italian reg, white, and green. I made the cookies to match my composting diagram for Prospect Farm. I brought the cookies to Compost for Brooklyns Block Party to highlight the layers of trench compost. Each cookie acted as a mini trench compost diagram. A cute idea that some appreciated, and had some asking is this made of dirt?

Rainbow Cookies
2 tblsp plus 2 cups unsalted butter, at room temp
6 large egg white
6 large egg yolks
1 1/3 cups sugar, divided
12 oz almond paste (not marzipan), chopped
2 3/4 cups plus 1 tblsp flour
1 tsp salt
1 tsp red food coloring
1/2 tsp yellow food coloring
1 tsp blue food coloring
3/4 cup orange marmalade
4 oz bittersweet chocolate

Whip 6 egg whites until soft peaks form. Add 1/3 cup sugar and continue to beat until firm peaks form. Chill. Meanwhile line three 9 x 13 inch rectangular baking pans with foil, allowing foil to overhang length-wise. Grease foil and sides of the pans with 2 tablespoons of butter.

Add 1 cup of almond paste and sugar to a mixer and beat at medium speed for 5 minutes. Increase speed to medium high and slowly add 2 cups of butter. Beat until fluffy. Add in yolks, one at a time until combine. Add salt and flour, being careful not to over mix. Fold egg whites in two additions by hand with a spatula. Lots of work, eh? Take a breather.

Uggh, I hate artificial colors, but its a tradition.
You can use green in place of blue to, so Italian.

Preheat oven to 350. Divide batter into 3 bowls. Add 1 color of food coloring to each bowl, and fold until evenly colored. Now youre ready to bake. Transfer each colored batter into one prepared pan. Spread evenly, and place in oven. Bake for 9-12 minutes. Rotate pans half way. Remove cakes from the oven when batter is just set.

Yellow layer will go up, over, and on top of the marmalade covered red layer

Meanwhile melt marmalade. The recipe suggests you strain the peel parts out, but I think its fine to leave it in. Brush half of the marmalade on top of the red layer. Lift the yellow layer up using the overhanging foil. Flip top-side-down over the red layer. Peel foil back. Brush the top of the yellow layer with remaining marmalade. Lift the blue layer up using the overhanging foil. Flip top-side-down over the yellow layer. Do not peel the top layer of foil. Place a cookie sheet on top of blue layer. Carefully flip all layers on to the cookie sheet. Place another cookie sheet over the red layer. Weight down with cans, and chill for 4 hours or up to one day. Congratulate yourself on completing the hardest part of making rainbow cookies. You are out of the woods.

Ready to chill? The layers are.

Melt the 4 oz of chocolate over in a double boiler (or a heat proof bowl such as stainless steel or tempered glass, over boiling water) or in a microwave. Whichever you prefer. Remove cake layers from fridge, and peel back top layer of foil. Brush half the chocolate over the red layer.

Take your time, and the results will line up neater then mine. Less trimming equals less waste.

Place uncovered in freezer for 15 minutes to harden the chocolate. Remove from freezer. Place wax paper on top of chocolate layer. Replace cookie sheet over waxed paper, and carefully flip so blue layer is now up. Peel back foil on the blue layer. Brush remaining chocolate over blue layer. Freezer, uncovered for another 15 minutes until hardened. Cut the cookie into 1/2 - 3/4 inch slices. Serve! Finally! I kept mine in an airtight freezer container until they were ready to be served.
 

Aquaponics get Here Copyright © 2016 -- Powered by Blogger